Step 1:
Open the SQL studio management

Step 2:
Enter your login credentials.

Step 3:
Select database option in your left panel then right click the database for create new database.

Step 4:
Enter a new database name for create DB. (eg: Database name is TEST) then Click next.

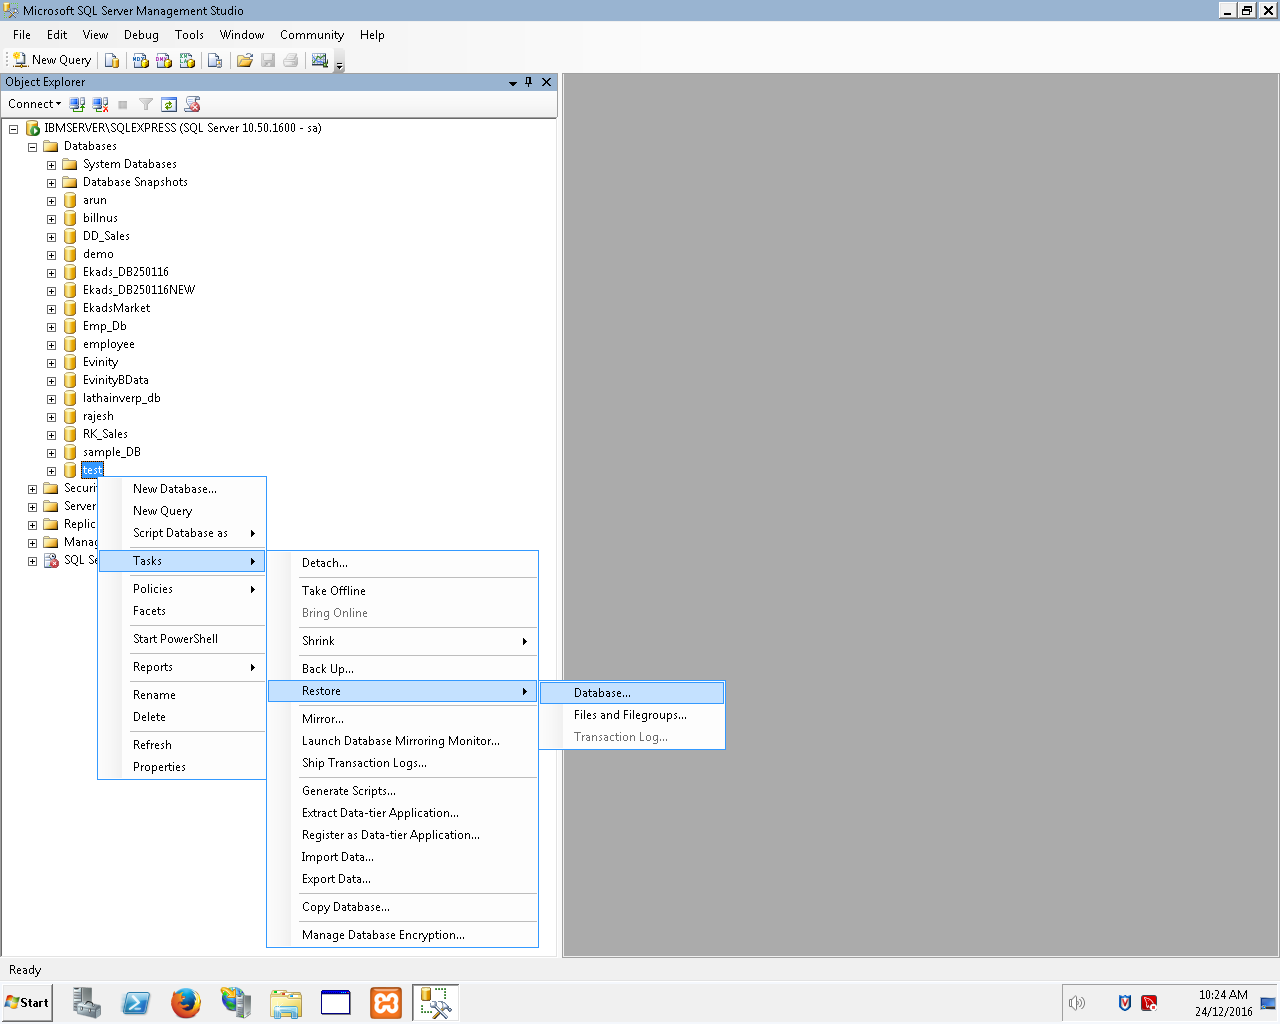
Step 5:
Now right click the test DB in left side panel then select task in sub menu and then select restore then click restore to database.
Step 6:
In windows, Select the radio button for restore the database from device and then click add button.

Step 7:
Select database for which database do u want to restore for test DB then click OK.(eg: test.bak)

Step 8:
Select check box restore in select backup sets to restore option.

Step 9:
Select the check box overwrite existing database and replication settings in restore options then click next.

Step 10:
DB restore process is sucessfully completed.

ahhhan
ReplyDelete