Saturday 2 August 2014

HOW TO USE Attrib COMMANDS


what is attrib command?

                      The attrib commands is a Recovery Condole command used to change the fill attributes for a file or directory while in recovery Console.

                      An attib command is also available from the command prompt.

Attrib Command syntax:

               attrib [+r|-r] [+s|-s] [+h|-h] [+c|-c] [file name]

               +r = this assigns the read only file attribute  to the file or directory.

               -r = This removes the read only attribute.

               +s = This assigns the system file attribute to the file or directory.

               -s = This removes the system attributes.

               +h = This assigns the hidden file attribute to the file or directory.

               -h = This removes the hidden attribute.

               +c = This assigns the compressed file attribute to the file or directory.

                -c = This removes the compressed attribute.

                file name = This is the file or directory that you are wanting to change the attributes.

Attrib Command Examples:

                    attrib +r c:\windows\system\secret folder

            In the above example, the attrib command is used to turn on the read only attribute, using the +r option, for the secret folder directory located in  c:\windows\system.

                    attrib -h c:\config.sys

            In this example, the config.sys file located in the root directory of the c: drives has it hidden file attribute cleared by the use of the -h option.

                   attrib -r -s -h /s /d "folder name"
          
             This command will remove attributes for all files folder and sub folders:r-read only s-system file h-hidden file the processing matching files and all sub folders.

                   attrib -h -r -s /s /d "folder name"

             This command is used to lock drivers or folders just alter "-" with "+". 


Friday 1 August 2014

Disk Defragment


What is disk defragmentation?

                  Disk defragmentation is the process of consolidating fragmented data on a volume(such as a hard disk or a storage device) so it will work more efficiently.

                  Fragmentation happens to a volume over time as you save, change, or delete files. The change that you save to a file are often stored in a place in the volume than the original file. this doesn't change where the file appears in windows only where the bits of information that make up the file are stored on the actual volume itself become fragmented, and your computer slows down as it has to look in different places to open a single file.

                 Disk defragmenter is a tool that rearranges the data on your volume and reunites fragmented data so your computer can run more efficiently, In this version of windows, Disk defragmenter runs on a schedule so your don't have to remember to run it, although you can still run it manually or change the schedule it uses.

Step by step procedure

Step 1: Uninstall any programs you don't use or need. It's best uninstall programs prior to a defragmentation, as the newly-acquired free space will generally be located all over the hard drive, thereby giving rise to fragmentation.

Step 2: Make sure the all unnecessary programs are closed.

Step 3: Cancel any programs that are scheduled to run. If you have not manually scheduled any programs to run, the skip this step.

Step 4: Delete any temporary files. This is done by running disk cleanup. To run the programs, go to:
START -> Run, and the cleanmgr in the window.

Step 5: Run the Disk Defragmented programs. Go to START - Run, and enter dfrg.msc in the window. A window that is similar to the one below should appear:


  •   Select the particular disk.
  •   Click to analyze button
  •   Analyze the disk drives
  •   After, Click to defragment button
  •   Automatically rearrange the disks.


Wednesday 30 July 2014

How to clean an infected computer with Kaspersky Rescue Disk


Kaspersky Rescue Disk 10 is designed to scan and disinfect x86 and x64-compatible computers that have been infected. The application should be used when the infection is so severe that it is impossible to disinfect the computer using anti-virus applications or malware removal utilities running under the operating system. In this case, disinfection is more efficient because malware programs do not gain control when the operating system is being loaded. In the emergency repair mode, you can only start objects scan tasks, update databases roll back updates and view statistics.

STEP 1: Download Kaspersky Rescue Disk

http://rescuedisk.kaspersky-labs.com/rescuedisk/updatable/kav_rescue_10.iso

Step 2: Download the Kaspersky USB Rescue disk maker

http://rescuedisk.kaspersky-labs.com/rescuedisk/updatable/rescue2usb.exe

step 3: Connect a removable USB device to your computer

In order to successfully record Kaspersky Rescue Disk 10 to a removable USB device, the device must meet the following requirements:

·         The USB device must be low-level formatted before recording.
·         At least 256 MB USB capacity. 
·         FAT16 or FAT32 file system.
If NTFS file system is installed on the device, you are required to format it in FAT16 or FAT32. Do not use an USB device with other operating systems installed on it, otherwise booting from Kaspersky Rescue Disk may be incorrect or end up with an error.

1.Click Browse. 
2. Select the destination folder and click OK. 
3. To start the extraction, click Install. 
      After the work of the utility for recording is completed, the Kaspersky USB Rescue Disk Manager window will open. Select the destination for the downloaded Kaspersky Rescue Disk 10 image using the Browse button. Run the downloaded file rescue2usb.exe.
4. Select the required USB device from the drop-down menu.


5. Click START.


6. Wait until the process is complete.

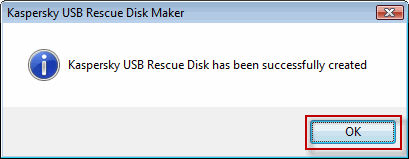
7. Click OK on the open window informing that Kaspersky USB Rescue Disk has been successfully created.


Boot your computer from Kaspersky Rescue Disk 10

Restart your computer. After reboot, a message will appear on the screen: Press any key to enter the menu.


Press any key.

If you do not press any key in 10 seconds, the computer boots from hard drive automatically.In the start up wizard window that opens, select the graphic interface language using the cursor moving keys. Press the ENTER key on the keyboard.


Read carefully the license agreement of Kaspersky Rescue Disk. If you agree with all terms, press 1 on the keyboard. To reboot the computer, press 2. To shut down the computer, press 3.


Select one of the following start up methods:Kaspersky Rescue Disk. Graphic Mode loads the graphic subsystem.

Kaspersky Rescue Disk. Text Mode loads the text user interface represented by the Midnight Commander (MC) console file manager.


Boot from Hard Disk.


Press the ENTER key on the keyboard.


Once the actions described above have been performed, the operating system starts. It scans your computer for connected devices and searches for file systems of your local and removable disks. Once the operating system has started, you can start work with Kaspersky Rescue Disk 10. 


Scan in graphic mode

In order to start a scan process using Kaspersky Rescue Disk and remove malware from the computer, perform the following actions:

Boot your computer from Kaspersky Rescue Disk in graphic mode.

In the bottom left hand corner of the screen click on the kaspersky icon button and select Kaspersky Rescue Disk from the open menu.

Update antivirus databases of Kaspersky Rescue Disk. To do this, go to the My Update Center tab and click on the Start update button. You can find detailed instructions on how to configure Internet connection via the application interface in KB6327.

Wait until databases are updated.

Go to the Objects Scan tab.

Check the boxes next to objects to be scanned for viruses. By default, Kaspersky Rescue Disk scans Disk boot sectorsand Hidden startup objects.

Click on the Start Objects Scan button.

Once the scan process is complete and malicious objects are detected, the application will asks you to select the action to be performed with detected threats. You can select one of the following actions:

Disinfect. After an object is disinfected you will be able to work with it.

Quarantine. If the scan of quarantined objects after update option is enabled in the application settings, quarantined objects will be rescanned after each databases update and as soon as objects are disinfected they will be available to work with.

Delete. You can delete infected objects if disinfection fails. Info about deleted objects will be displayed in the report.


Saturday 1 March 2014

How To install Rational Rose Enterprise Server and import the License


STEP BY STEP PROCEDURE

1.Double click from the Setup File.


2.Select an install directory.


3.Select Rational Rose Enterprise Edition from the Rational Products folder below (see the blue highlighted file below) and click NEXT.


4.Select Deployment method to Desktop installation from CD-image.


 5.Click Next.


 6.Accept from the license agreement action.


7.Click Next..


8.Click Install the enterprise edition wizard.


9.Finish.


HOW TO IMPORT THE LICENSE FILE


1. The License Key Administrator Wizard launches automatically at the end of the
installation(by choosing the menu: Start => Programs => Rational Software => Rational License Key Administrator).


2. Select browse button and browse from the .upd file and then select from IMPORT button.


3.Successfully imported on the license file.